
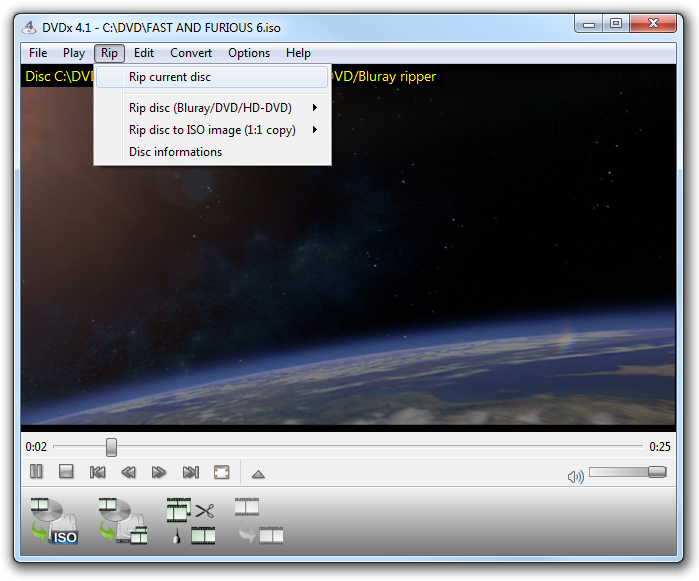
Rip and transcode DVD or Blu-ray disc
(activation required)
- Load Blu-ray / HD-DVD / DVD in disc ripper
- Select title, audio track and subtitles to rip
- Load transcoding profile
- Choose profile level
- Start rip and transcode
1. Load Blu-ray / HD-DVD / DVD in disc ripper
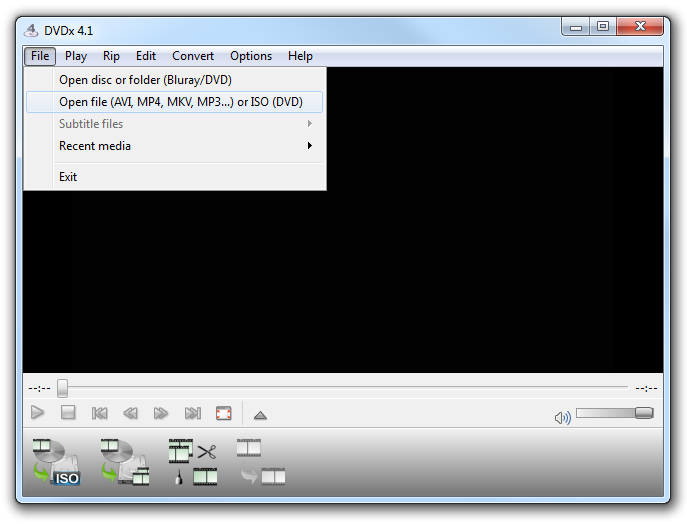
First you must load the disc in DVDx 4.1, either from main menu which loads disc in the player (full-featured player to preview movies), either from disc ripper menu.
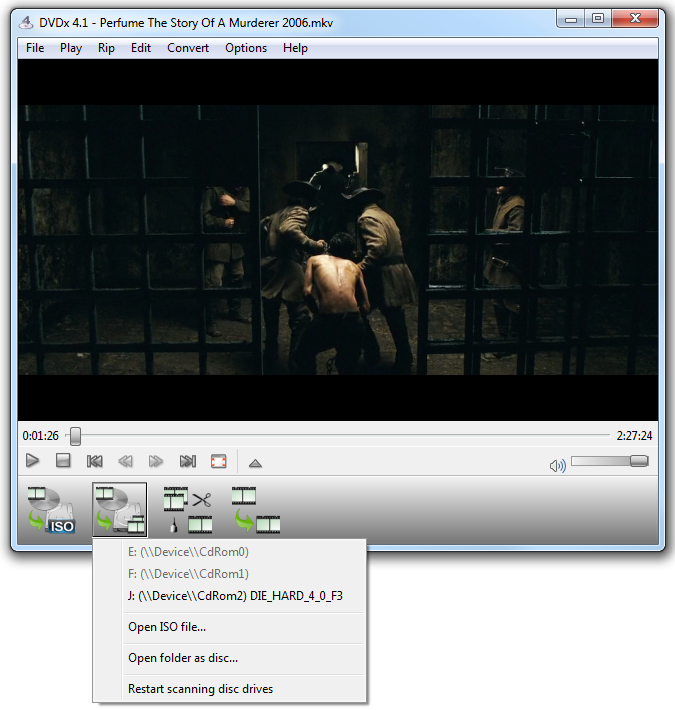
Load Blu-ray / HD-DVD / DVD in disc ripper
Physical discs in drives are automatically loaded at start or when they are inserted.
You can load an ISO file (DVD/HD-DVD/Blu-ray ISO).
You can load a disc from its folder path (usually VIDEO_TS for DVD or BDMV for Blu-ray).
Load disc in player (ripper auto-loading)
You can load disc for playback and ripping.
However encrypted HD disc (Blu-rays and some HD-DVDs) won't play, so loading fails and you MUST load them directly in the ripper.
2. Select title, audio track and subtitles to rip
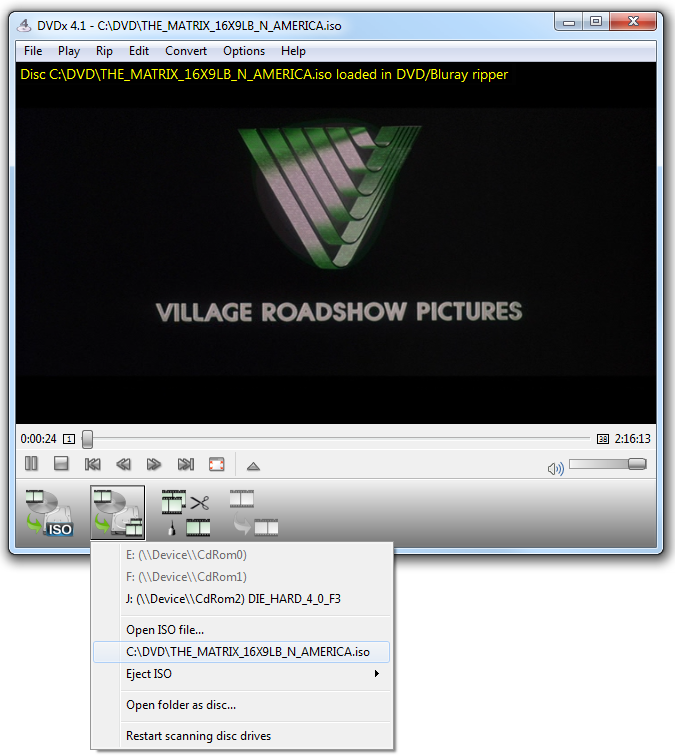 |
Open the disc ripper window from the ripper widget menu (from where you can eject loaded discs too). And OSD message alert you when start loading a disc and when the disc is loaded (screenshot beside shows OSD 'loaded' message). |
 |
Alternatively you can open the disc which is loaded for playback (which is also available from ripper widget menu).
|
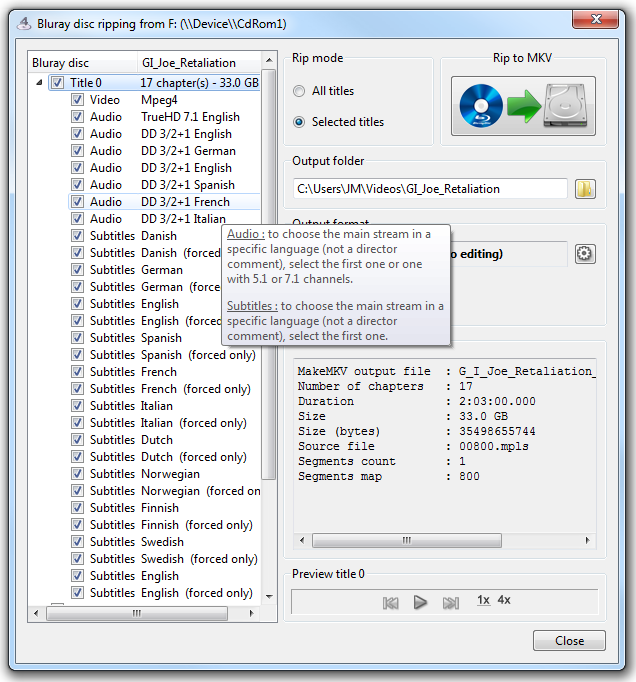 |
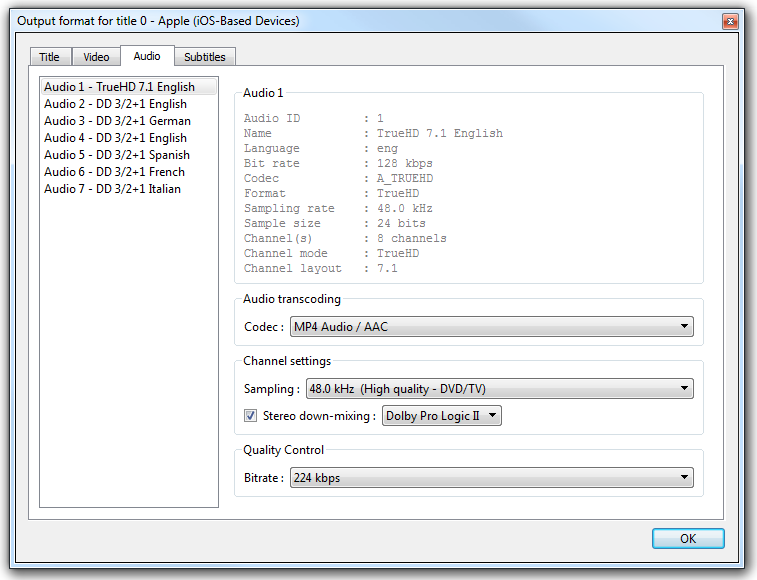
Now the ripper window is open, you select audio tracks and subtitles you want to get in the ripped movie. You do selection for every title you want to rip. By default the main movie is already selected with all its tracks.
|
3. Load transcoding profile
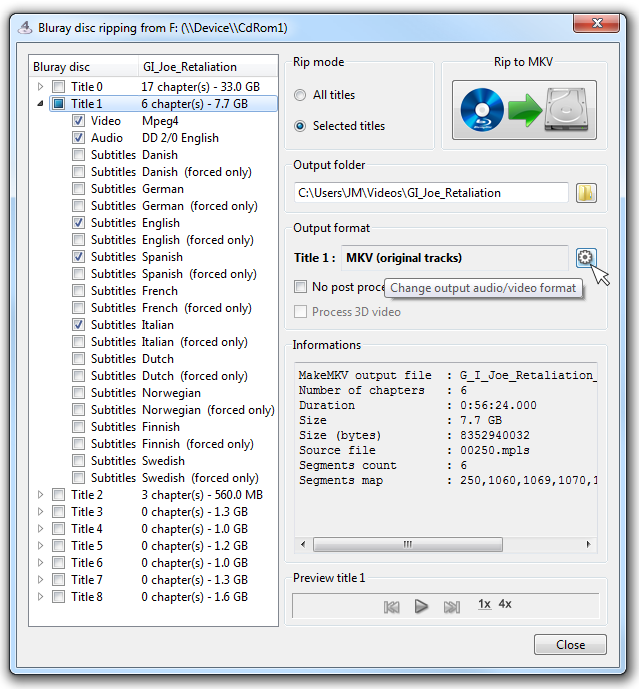 |
Click the small gear wheel button to change output format.
Important:
|
Other choices:
|
|
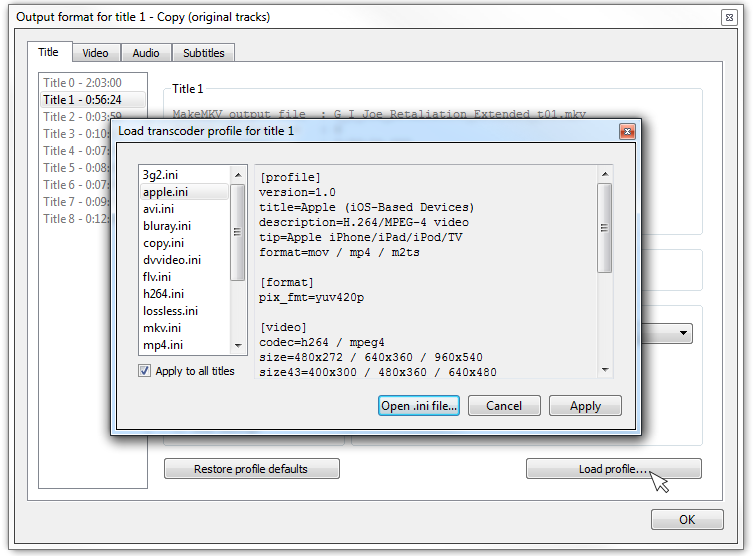 |
Now the output format window is open, click Choose to apply this profile for current title or for all titles.
|
4. Choose profile level
| All good profiles settings are chosen for you but you can change profile level to get a smaller file or a better quality one. |
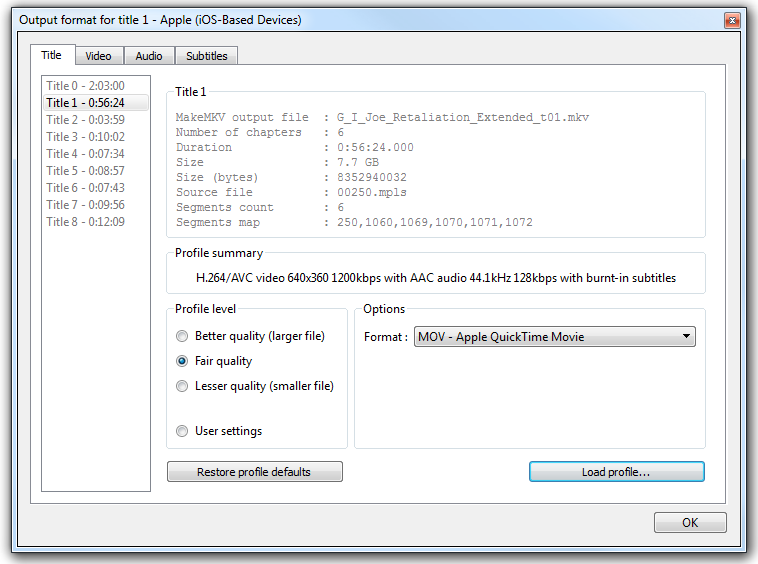 |
Advanced user can select 'User settings' level and tweak video and audio formats. |
Video settings
Deinterlace video:
- If the disc is a documentary (wild life, ...) or sports (soccer World Cup, Super Bowl, ...) it's safe to select '
Deinterlace video'.- Movie disc bonus (making-of, ...) might be deinterlaced as well (particularly if 4:3, likely not if 16:9).
Remove letterbox:
- Most movies are in widescreen format (2.35 or 2.40) which you can remove horizontal black bars (letterbox).
- Bug in 4.1.0.1 release: remove letterbox only if output resolution is the same aspect ratio (choose 720x304 for 2.35 for example). This has been fixed in 4.1.1.0 release for anamorphic output resolution.
Audio settings
For multi-channel audio streams (Dolby/DTS 5.1 and 7.1),
Dolby Prologic IIstereo down-mixing is automatically selected for stereo output. This keep best audio experience in stereo output.Subtitles settings
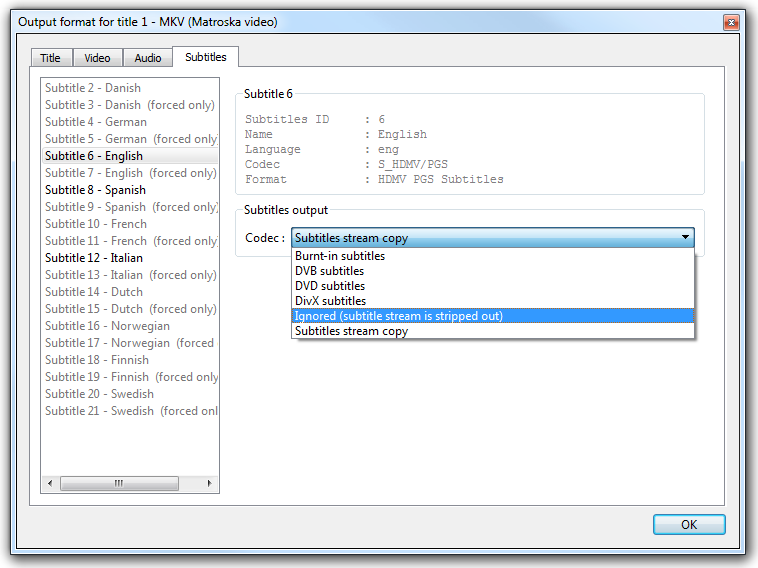
If you select multiple subtitles tracks but output format doesn't support multiple subtitles, only the first one is selected and will be burnt-in output video (permanent subtitles).
You can choose which ones to ignore and which one to be burnt-in.

5. Start rip and transcode
 |
|
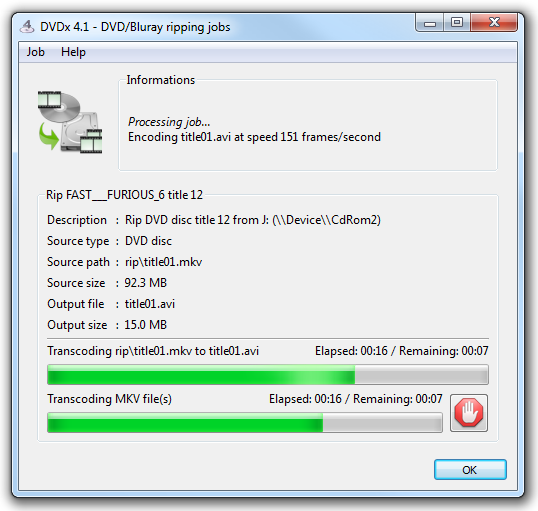
| The ripper job manager shows you ripping and transcoding progress: | |
 |
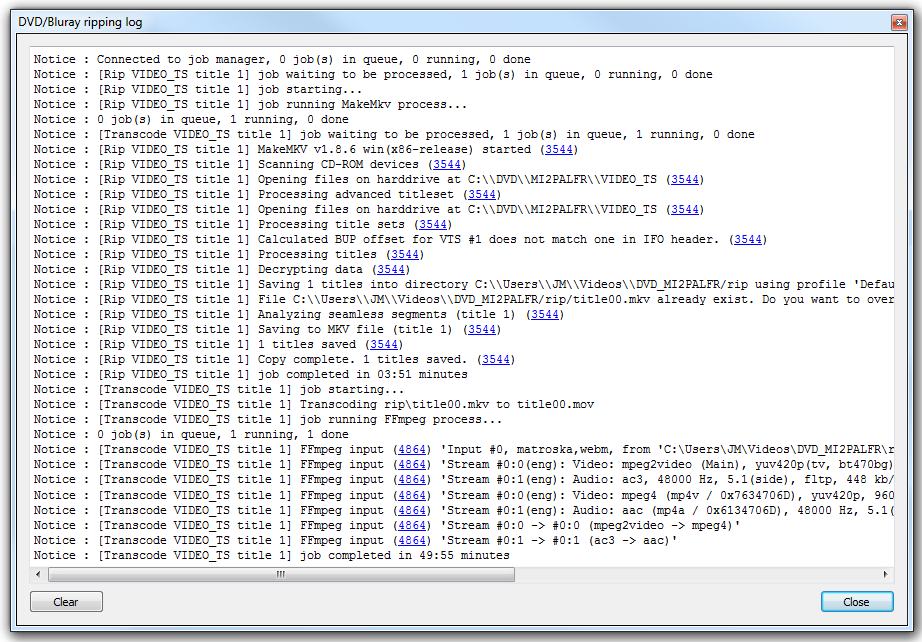 |
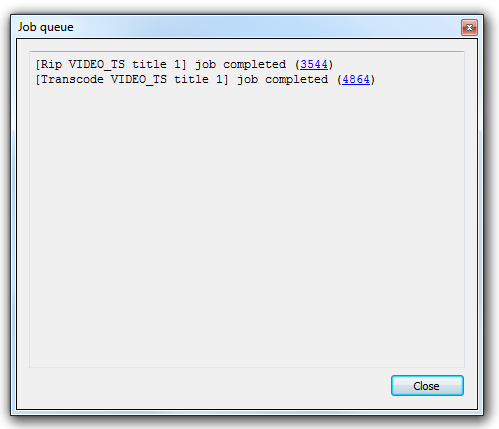
| You can get more details in the job queue display and in the job log messages. | |
DVDx 4.1 is very fast: a DVD copy with MPEG-4/AVC transcoding may take 1 hour, and 2 hours for a Blu-ray disc. However, please note that first estimated values displayed by DVDx 4 are pessimistic: il will say that a DVD copy may take up to 4 hours (7 hours for a Blu-ray disc) and after 10 minutes transcoding estimated values will be more realistic saying about 55 minutes remaining. This duration highly depends on your computer CPU speed and hard-drive write-mode performance. |
|